Pages

Showing posts with label painting. Show all posts

February 11, 2020

TWO SIMPLE DIY VALENTINE'S CRAFTS FOR KIDS


The girls and I got creative this year on Valentine's gifts to give their friends. All three of my oldest are in the same Kindergarten class so I wanted to come up with something that was a little different and something they could all create together to gift the kids in their class. So I looked through our craft boxes and came up with a couple simple DIY projects that were both entertaining for them and super simple for mama (win win)! 

It was fun to see them create something as they thought about each friend in their class and it made for a fun activity and memory we all go to do together. The best part is, this project is super cheap and very simple! I hope you enjoy and are inspired to create something like this with your kiddos too!
____________________

-DIY MINI CANVAS PAINTINGS-

**If you're on Pinterest be sure to Pin this Image below so you can save it and come back to it later!**


WHAT YOU'LL NEED:

-watercolor or acrylic paper (the heavier weight the better)
- wooden craft popsicle sticks
-paint colors of choice
- paint brushes
- hot glue gun + glue sticks
- scissors + twine

(All of these supplies can be found at Walmart craft section, Hobby Lobby, or Michaels craft store)


STEP 1:

Cut out squares of paper, roughly 4.5 x 4.5 inches 
(enough to fit within the size of the framed sticks)

STEP 2: 

Hot glue the sticks around the edges of the paper creating a frame
(I did this myself to prep the canvas' for the kids ahead of time, I didn't let my kids do the hot glue and I don't recommend kiddos doing that)

STEP 3: 

Let the kids have fun painting and creating however their hearts desire!

STEP 4: 

Once the paint is dry, turn it over and hot glue the twine on the back to hang up the canvas when it is finished! 
And Voila! You're done!


Now you have a sweet piece of art from your kids to cherish for years to come! These would also be cute as unique gift toppers or mini canvas' you can paint on yourself in case you don't have kids to paint them for you :)


______________________

Our next project we did was a yarn keychain for each of the kids in their class. I thought it would be meaningful for the girls to give a friend a keychain with the first initial of their name so they could wear it on their backpack or use it somewhere around their home. This one required a little more help from me, but I think if your kids are a little older it is totally doable for them.

DIY YARN INITIAL KEYCHAIN

**Be sure to pin this image so you can come back to this tutorial later on!**


WHAT YOU'LL NEED:

-Yarn any color of choice
-pencil
- cardboard scraps 
(I used a box we were recycling, I recommend  cardboard from a shipping box or something at least this thick to hold up the yarn)
-scissors
-ball and chain for the ring 
( I purchased mine from Amazon, there are a lot of options there for these)
-hot glue gun + glue (optional)


This one requires more gluing, so make sure the glue is dry before passing it off for them to start so they don't get burned by the glue

STEP 1:
Pencil sketch your initial in block letters onto the cardboard, be sure to make the letter wide enough so it won't be too thin and fall apart when cutting it out

STEP 2:
Cut out your initial letter

STEP 3: 
Take your yarn and grab one end to start wrapping onto your cardboard. Place a dot of hot glue onto the corner you are going to start on your letter then place the yarn on top of that to stick.

STEP 4:
Once the glue is dried start wrapping your yarn around the cardboard letter. There is no right way to wrap the yarn, just wrap in any direction you'd like, enough to start covering up all the cardboard underneath.

STEP 5: 
Once your letters in fully wrapped in yarn, take the hot glue again and glue the end of the yarn onto the back to secure the yarn in place. 

STEP 6: 
Once the glue is dry, take your ball and chain and squeeze it through a few pieces of yarn towards the top of your letter. I made sure the chain was underneath the yarn enough so it felt secure in there. 

And that's it! Now your kids can attach it to their backpacks and show it off! 


Hope you enjoyed these. I'd love to see what you create so be sure to share with me and tag me on Instagram so I can see! You can also follow along on my Pinterest to see other fun things I've been pinning an DIYs I'm saving too.


October 18, 2018

Pumpkin Day


We celebrated our first annual pumpkin day this year. Any time there is a reason to celebrate and plan a day of fun activities, I'm AAAALL in! The girls and I were at the grocery store one day and saw a mountain of pumpkin flavored things in the middle of the aisle and came up with the idea together to have a day, "pumpkin day", consuming all the pumpkin-y things and making an activity day out of it to welcome the fall season. They were ecstatic about the idea as we loaded the cart with pumpkin spice everything! 

It was a simple day. We started with pumpkin pancakes followed with a trip to pick out pumpkins to carve and paint on. Every year we have a day of painting on pumpkins together so it was fun to keep that tradition alive and add it to our day. After the girls rested, we made this delicious pumpkin dutch apple pie, ate pasta with pumpkin cream sauce and finished the day watching "It's the Great Pumpkin, Charlie Brown". There were more things on our list that we didn't get to (maybe I was a liiiiittle over ambitious), but it only meant that we had more fall activities to do together on another day!

Before I had kids I knew that creating traditions and memories like this would be one of my favorite things to do as a parent. The best part is watching them get into it and be so excited for the day and tradition too. By the end of the night they were all saying that they didn't want pumpkin day to end! I love that these girlies of mine are just as into celebrating as I am. Doing it together is what makes the tradition so special anyways. 

In case you are wanting to start your own pumpkin day traditions I came up with some more fun ideas to do for the fall season. I'd love to hear more if you have more ideas that come to mind too, so please feel free to share!

PUMPKIN DAY ACTIVITIES:
-Go to the pumpkin patch
-paint pumpkins
-draw pumpkin pictures
-make pumpkin shape cookies
-carve a pumpkin together as a family
-play pumpkin bowling
-play pumpkin ring toss
-play hide and seek with pumpkins around the house
-bake pumpkin pie
-bring a pumpkin to someone you love just because
-make a fall garland together
-make pumpkin spice apple cider
-watch pumpkin/fall themed movies 

I also created this free download coloring page for you to use with your littles whenever you start your pumpkin day tradition too. Click here to grab it:


And if you do, I'd love to see! So please share and tag @coleykuyperart/ #coleykuyperart so I can see how you celebrated too!

Happy Fall!


February 13, 2018

Boho Inspired Wedding Invitation Suite


Creating wedding invitations are some of my favorite projects. A couple months ago I created this suite for my brother and sister-in- law's wedding and I loved every bit of it. They're outdoor wedding had a laid back feeling with boho elements which made this really fun to dream up and create. Something I love to do when coming up with a fully custom suite is putting in simple details that are personal to the bride and groom. On the back of the invitation I added the illustration of a little picnic seating with their initials etched into the vases. Since they're wedding was outside and had picnic seating during the reception, the illustration gave a sense of what to expect from the wedding and tied in with the whole theme. Almost every part of this suite was hand painted and lettered, giving it a unique and organic look. We printed it on a creamy card stock and added the mossy green envelope to it to tie everything together. I loved designing every part of this from start to finish and loved even more that I got to create it for some of the people I love most! 

I listed this suite in my Etsy shop, making it available for any of you planning a wedding in the near future. You can click here to take a look, along with other pieces I have added to the shop for your sweet day. 

September 8, 2015

Grow Old With Me Custom Piece


I recently finished this commissioned piece for a sweet newlywed couple and I'm so happy with how it turned out. I painted and hand lettered the entire 2'x3' piece for their bedroom and I loved the quote and sentimentality behind it. It's so fun creating art I know will be displayed and loved for years and years to come. 

May 6, 2015

Custom Skateboard


This is from a way long time ago, but its something I created nonetheless so I wanted to share it here anyways. I customized this skateboard for my brother as a Christmas present one year. I wanted to give him something that he could use and also have as something that was personal to him. My maiden name is "Lyon" so painting a picture of Aslan seemed like the perfect fit. I hand carved the outlining of the picture on the bottom of the skateboard. Before painting the lion I also subtly engraved his name "Noah Lyon" in the mane. I was pretty happy with the turnout and super excited to give it to him. Its something he can have for years to come and the best part is that no one else but him has one like it! 

March 16, 2015

Spring Time Printables


I don't know about you, but I'm feeling the itch for spring weather like crazy. The sun has being popping out more and more the past couple weeks which has inspired me to break out the paint brush. These lovely spring inspired illustrations, along with a few others, are up for sale in my Etsy shop this week! And the best part is that you can get them instantly by printing them straight from home. Once purchased, download the files and use them as framed art around the house, gift for a friend, or make it into a greeting card, the options are endless! Check out more in the shop here and tell your friends. Hope the days have been bright and sunny for you wherever you are!
Enjoy!

March 12, 2015

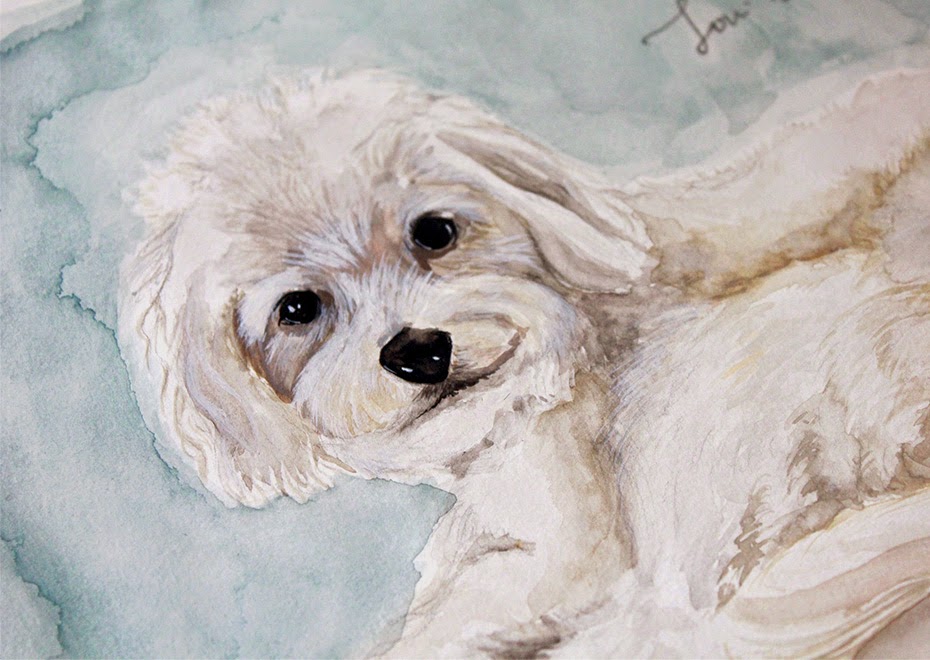
Louie the Dog

We celebrated a close friends birthday out here a couple weeks ago. I wanted to give her something special for her big day so I whipped up this water color portrait of her beloved dog to gift her with. She smiled and laughed in excitement when opening it, which I think meant she liked it. :)

December 31, 2014

Christmas in Germany


Christmas in Germany is quite the dream experience. Its been a little over a month since we moved here. Shane's job has given us the opportunity to live outside of our comfort zone and live overseas for a short while as he gets to assistant coach a professional team in our town as well as expand our horizons for ministry opportunities. As challenging as the past month and a half has been having three babies under one out here, I'm so thankful that we get this experience. This season might be the most I've ever celebrated the Christmas holiday, but it would be hard not to celebrate as much as we did being in this country. We decorated ornaments, baked cookies, drank hot wine, ate sausages, bundled up for chilly weather, and hit almost every Christmas market we could. Walking around the markets was my all time favorite, something out of a dream almost. Every town and building we saw was decorated and had its own character that added to the whole experience. I wish places like this existed in Phoenix! I'm sure gonna miss it come next year. 

The whole experience of being in this place has got me inspired to paint and draw and create so much. Its a challenge to pick up the paintbrush in between diaper changes and feeding, but I'm trying to make it a goal that whenever I have just a few minutes of "down time" (which is rare) I get out my sketch book and create something. Hopefully by the time we leave here I'll have my sketchbook filled with things I've been inspired by. And I plan on sharing more of that on a regular basis as the months continue.

Our Christmas morning was relaxed and peaceful. We ate crepes, and watched Raleigh open presents for the first time (all which were things we just found in her room). She loved it! She clapped and laughed after she opened each thing. It may have been more fun for us to watch than it was for her to open, but it was worth it. Later we walked around our town and discovered new parts we hadn't seen yet. And the day after Christmas we got our first snow! Aside from not having our whole family there with us, it couldn't have been a better day. One we'll remember for the rest of our lives. So thankful to God for this sweet experience he's given us and this sweet season we get to celebrate His grace and deep love for us.